-
Home Consoles
Handheld Consoles
Hybrid Consoles
- Tools & Supplies
- Clearance
- Repair Services
- Canadian Repair Shops
- Home
- Dreamcast
- USB-C Power Supply for Dreamcast USB-C Power Supply for Dreamcast


USB-C Power Supply for Dreamcast
- Description
- Reviews
The OEM Dreamcast power supply is a combined 110v/240v AC to DC converter. This is quite inefficient and noisy, which can manifest in a “fuzzy” video signal. Also, plugging in a UK 240v supply to a 110v Japanese Dreamcast can cause damage to the Dreamcast.
What the robot_retro Dreamcast Power Board Offers:
- Powered from a 15v or 20v Power Delivery USBC charger (e.g. Ankur, Dell, uGreen, etc.). Most 30W charger USBC will work (they have to be able to output 15v/20v). robot_retro recommends the uGreen Nexode mini 30W as this both excellent quality and value.
- Tested to be between 90 and 95% efficient across all loads.
- Low signal noise and heat.
- Drop in solution. No soldering, wires or complicated install required.
- No flashing LEDS, perfect for clear shells.
- Works perfectly with GDEmu.
- Works with all Dreamcast models (PAL, Japanese, etc) and removes the risk of accidentally plugging in 240V into a 110V system and causing damage.
- Overvoltage, over temperature and fused supply.
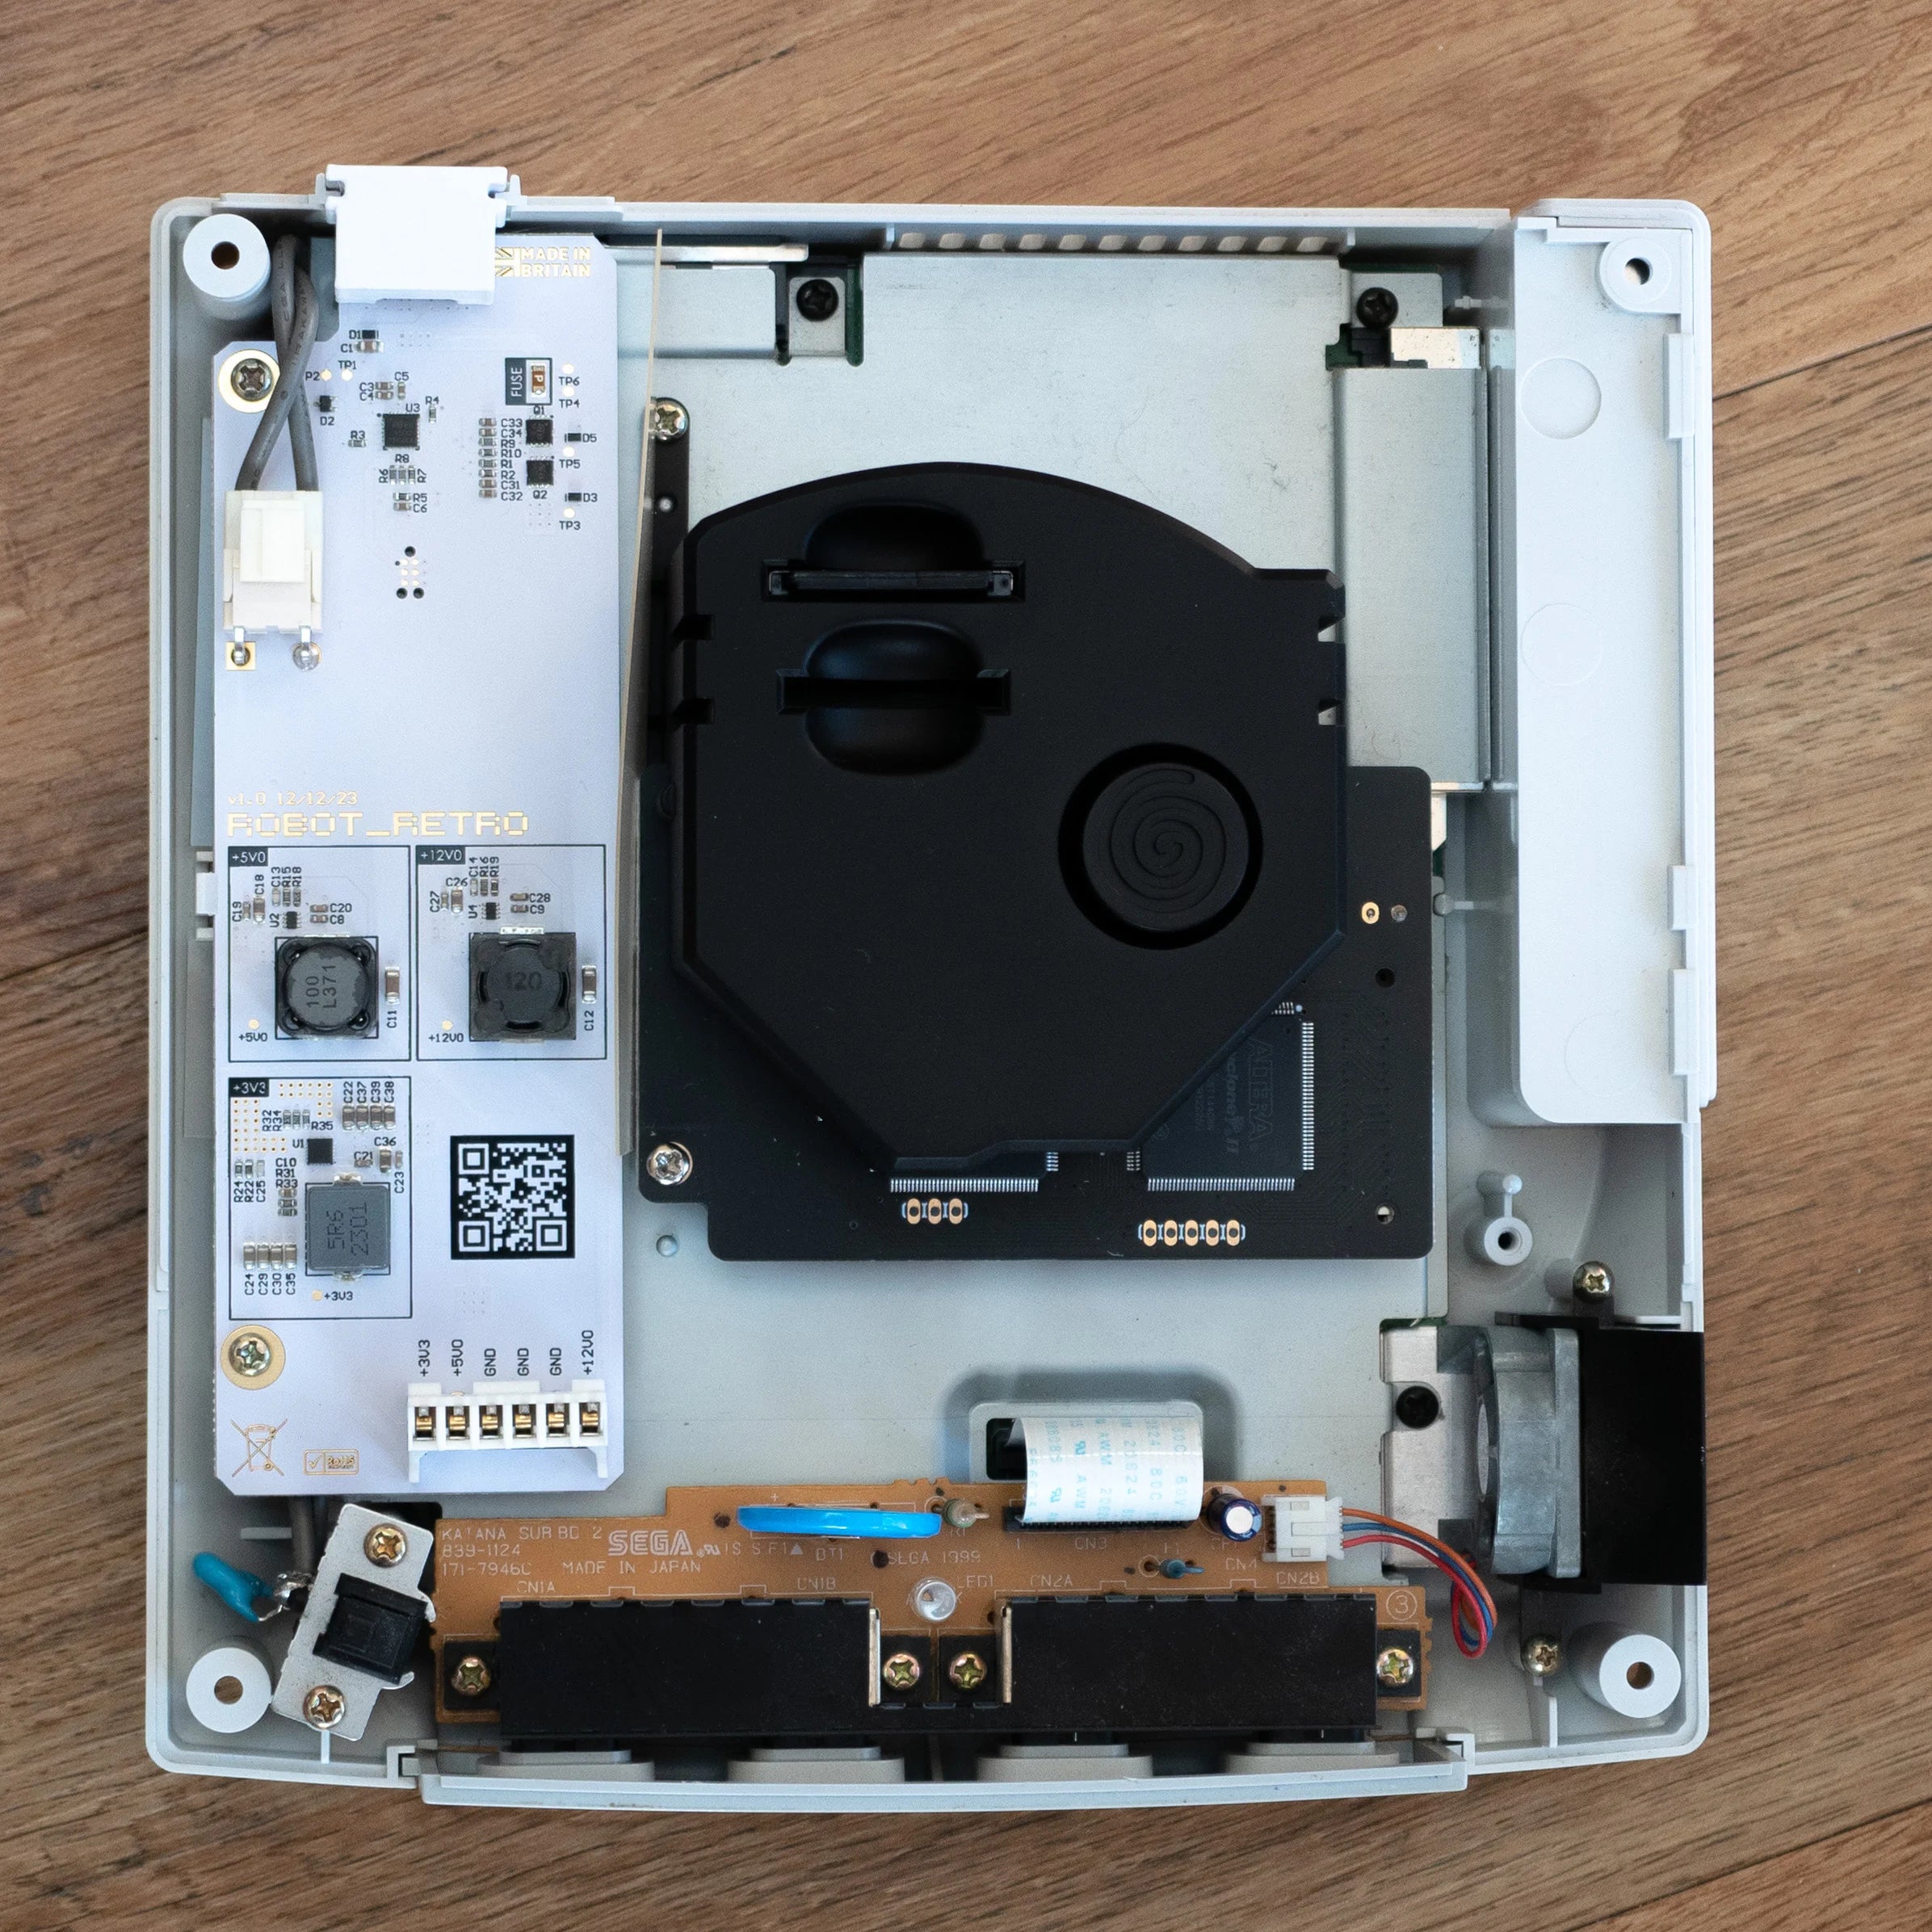
- Includes 5V and 12V Noctua fan headers
- White 3D printed spacer included. If you need another color, please let us know and we'll see if we can accomodate you.
Other 3D spacer colours can be printed from the files here.
Installation:
See tutorial and reviews from JoeBleeps and from Macho Nacho Productions.
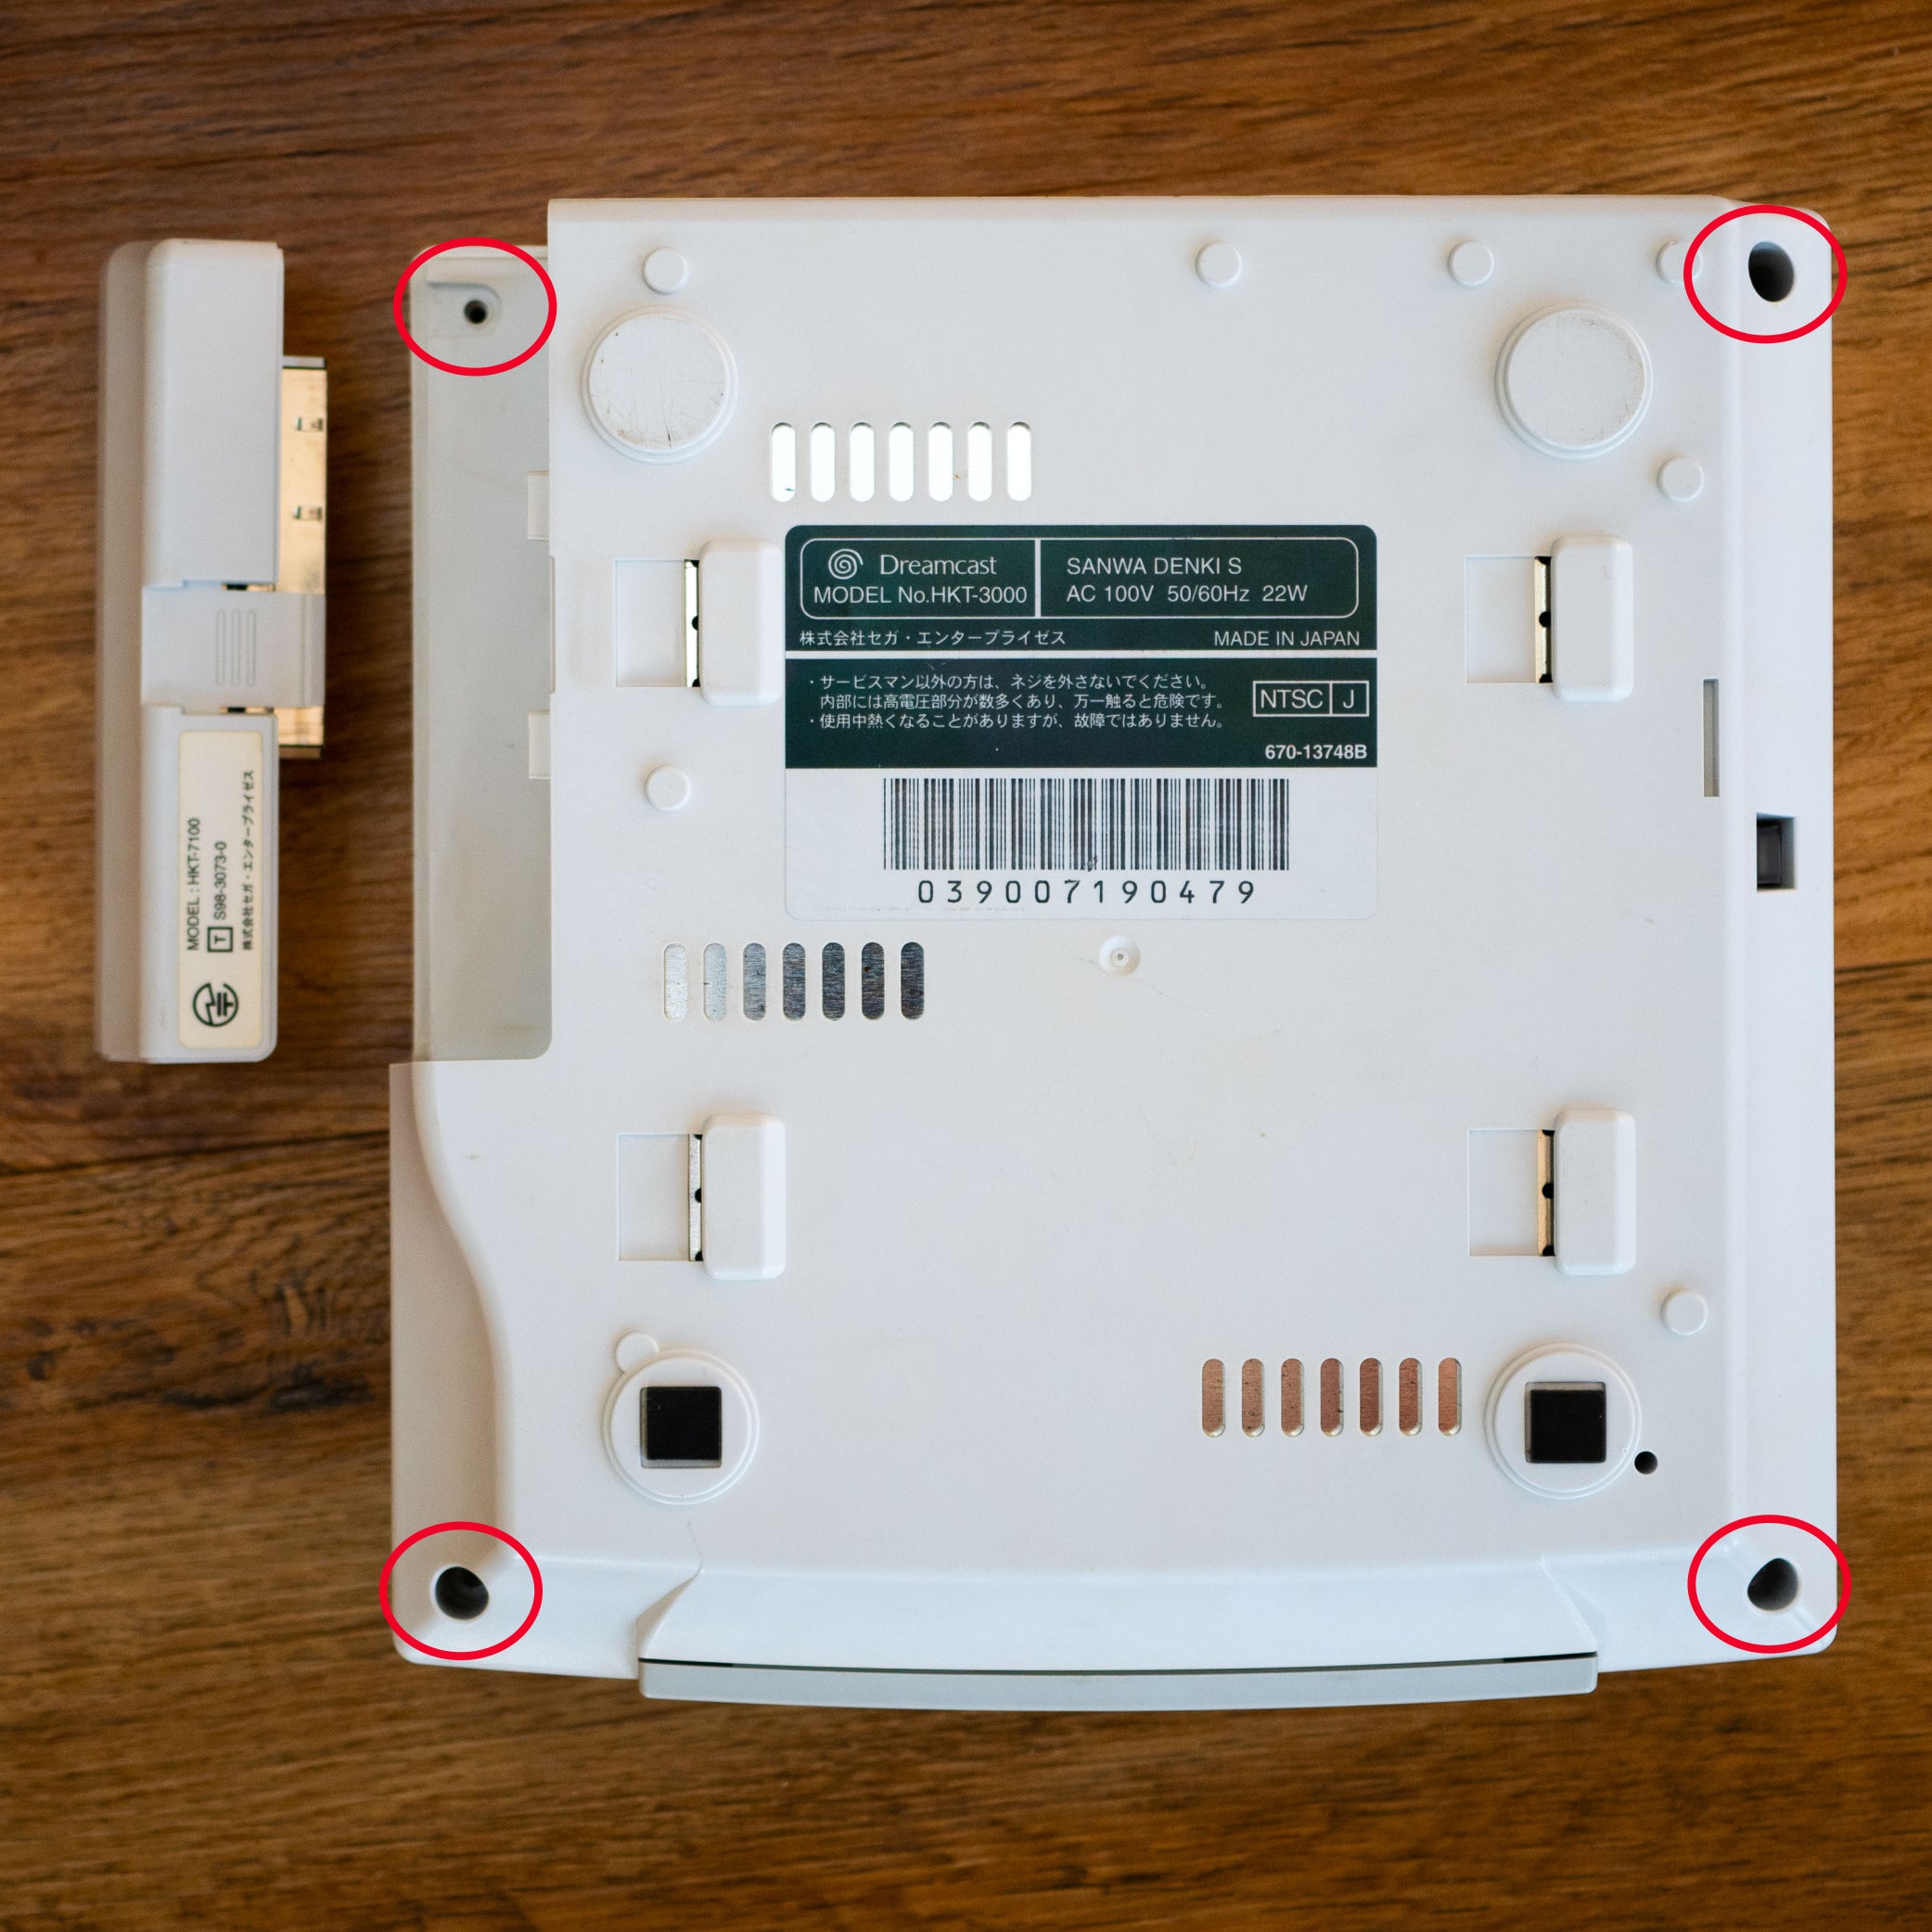
- Unscrew the four bottom Dreamcast screws as shown in the photo.
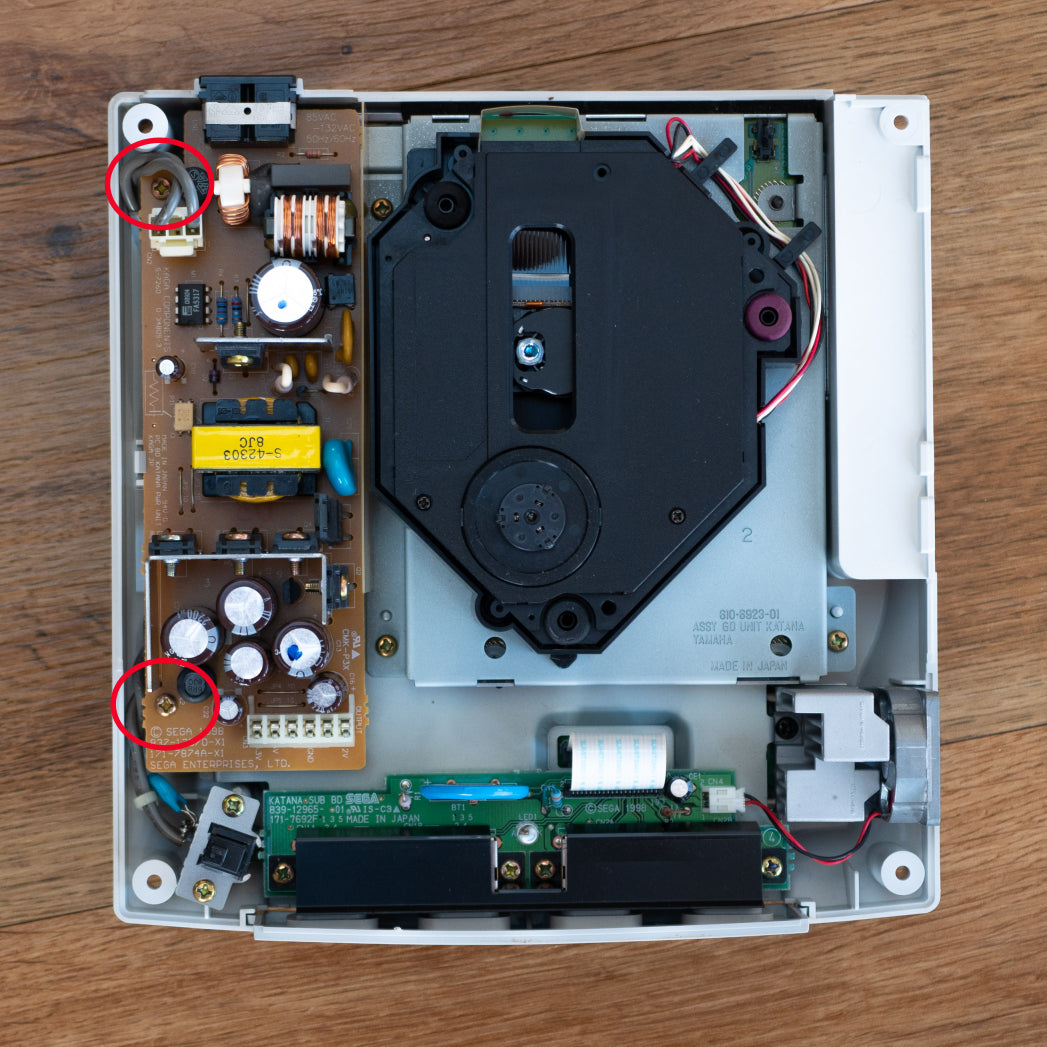
- Remove the top lid and then remove the two power board screws (see photos).
- Fit the robot_retro board in exactly the same way as the OEM power board was removed.
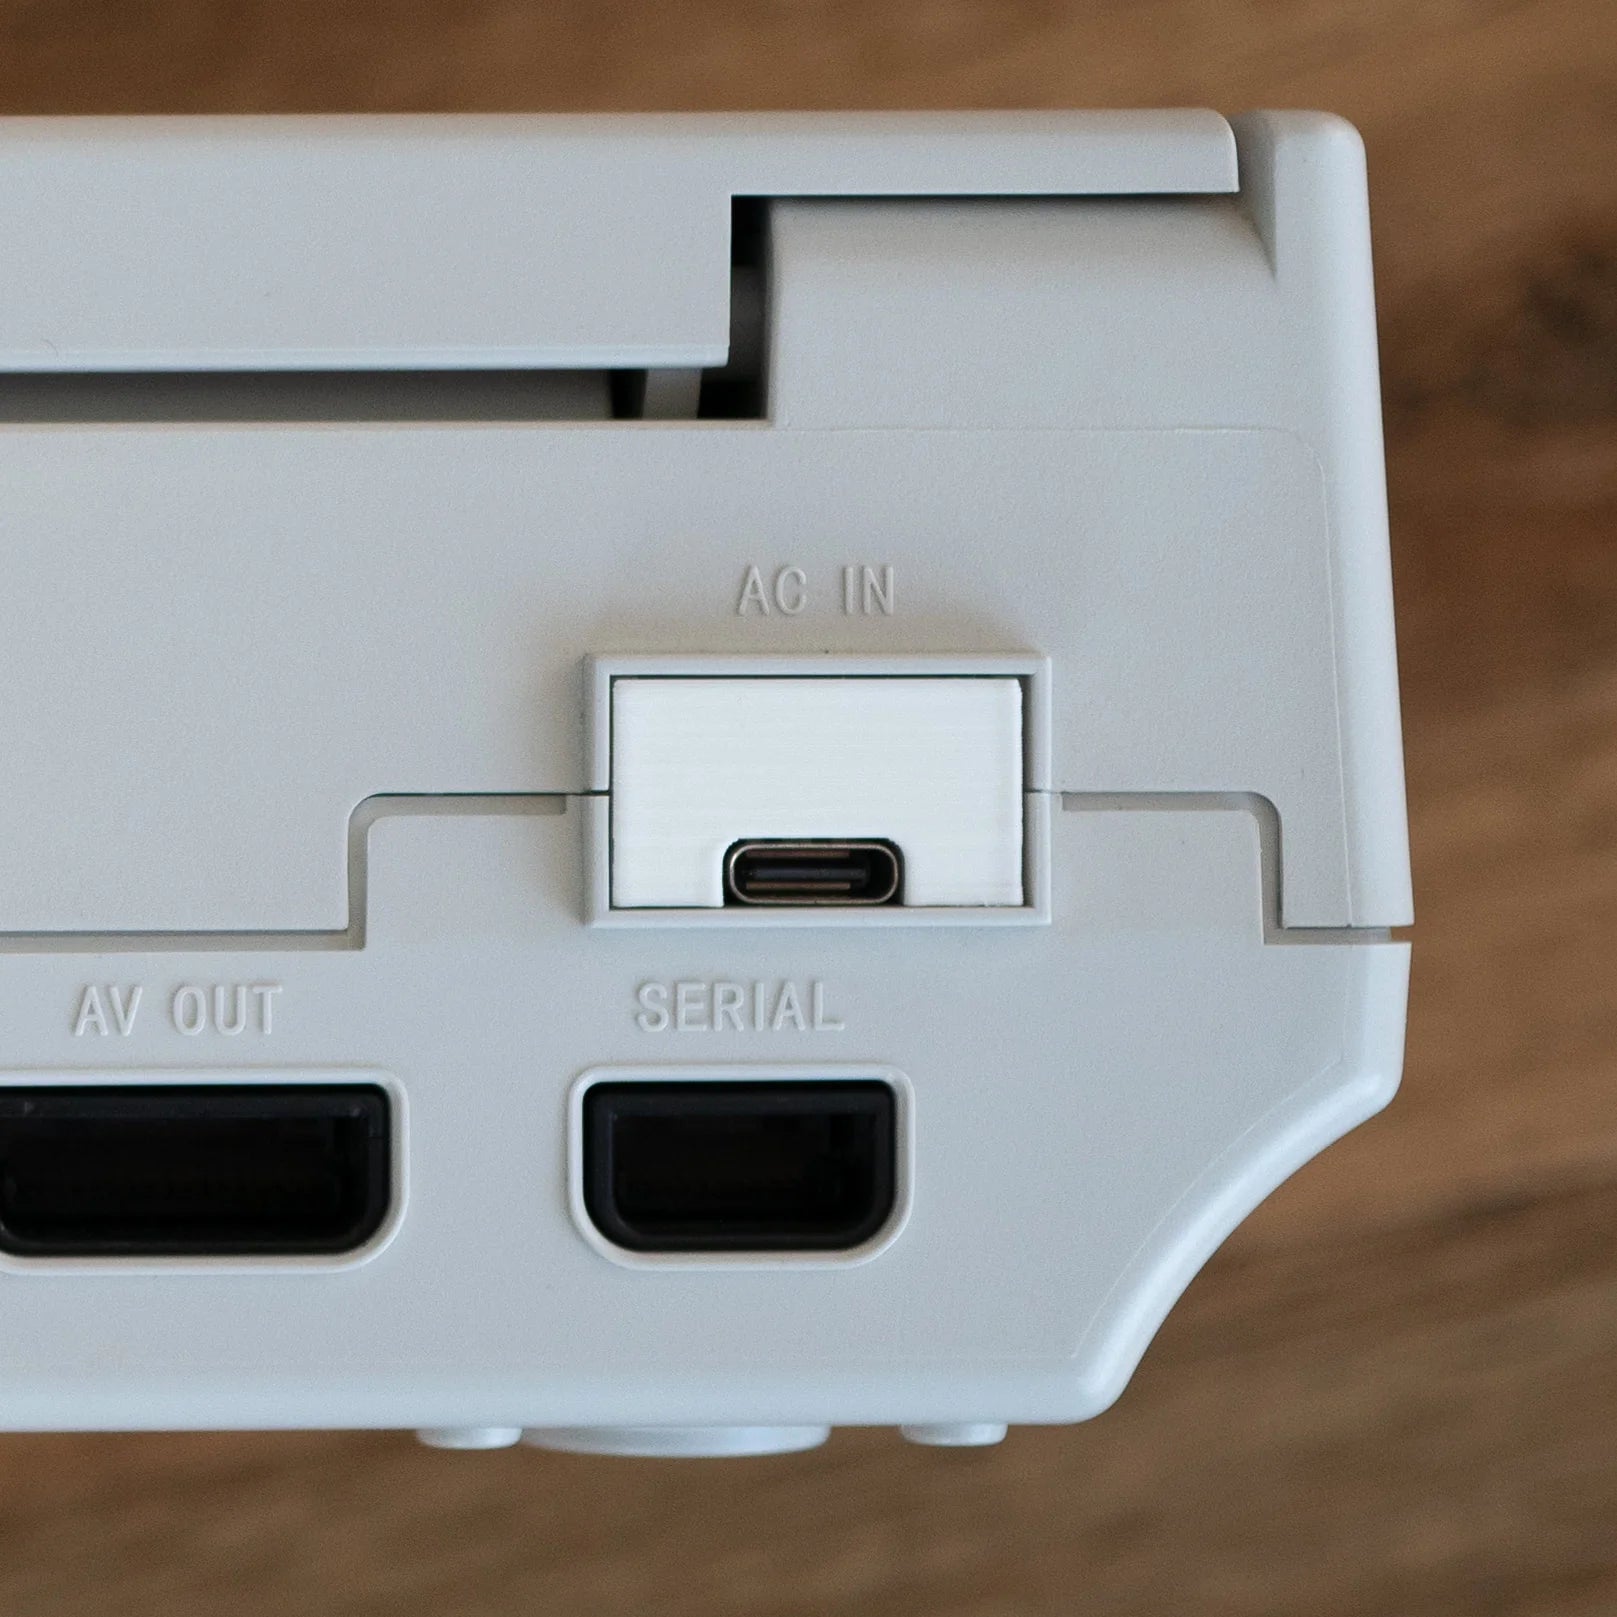
- Fit 3D printer USBC spacer.
- Button up the console.
Note: The Dreamcast still needs a fan connected into the OEM port in order for the console to boot.
Plug and play. No issues whatsoever. Had a dreampsu but wanted the cleanest power so I don’t have any video or audio distortion. Very happy with the purchase. Also buying Canadian is right now is important to me.
Awesome addition to my system thank you , it will be nice to use a usb c cable to power my system

