
Fast service
Orders shipped within 24H
Free Shipping
On orders for overs $150*

No result found for your search.
Your cart is empty
% $-18.95

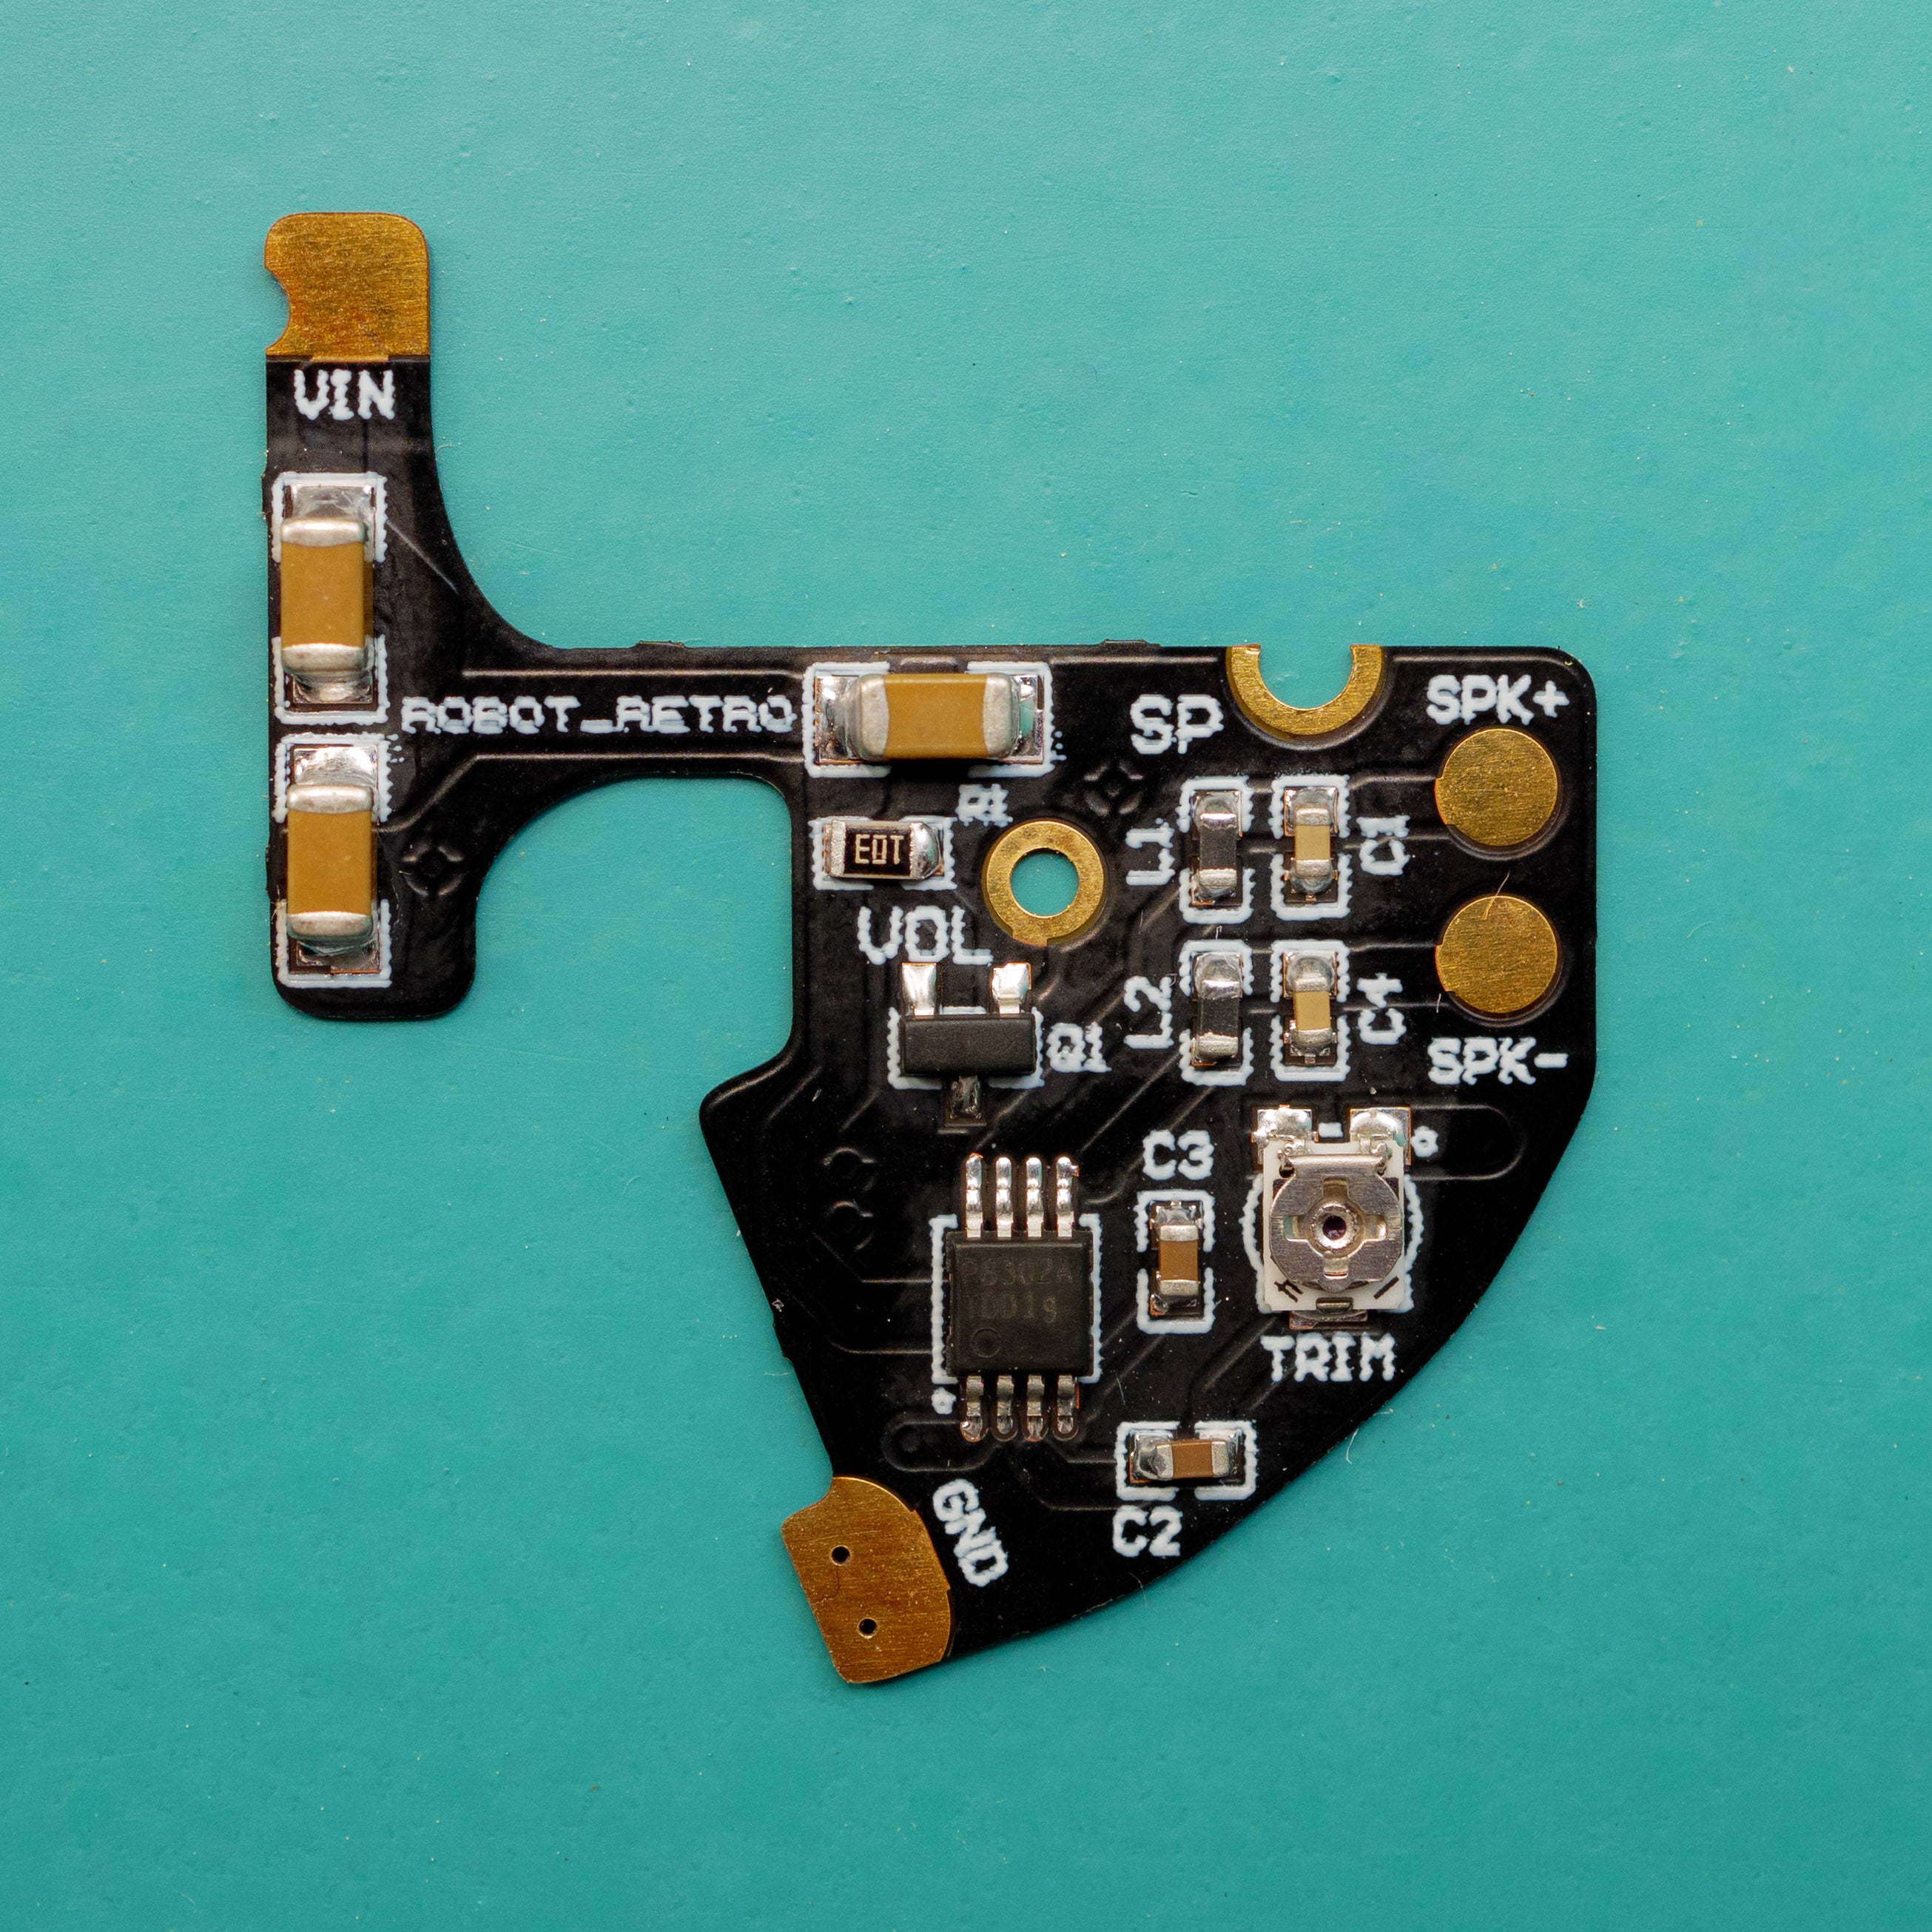
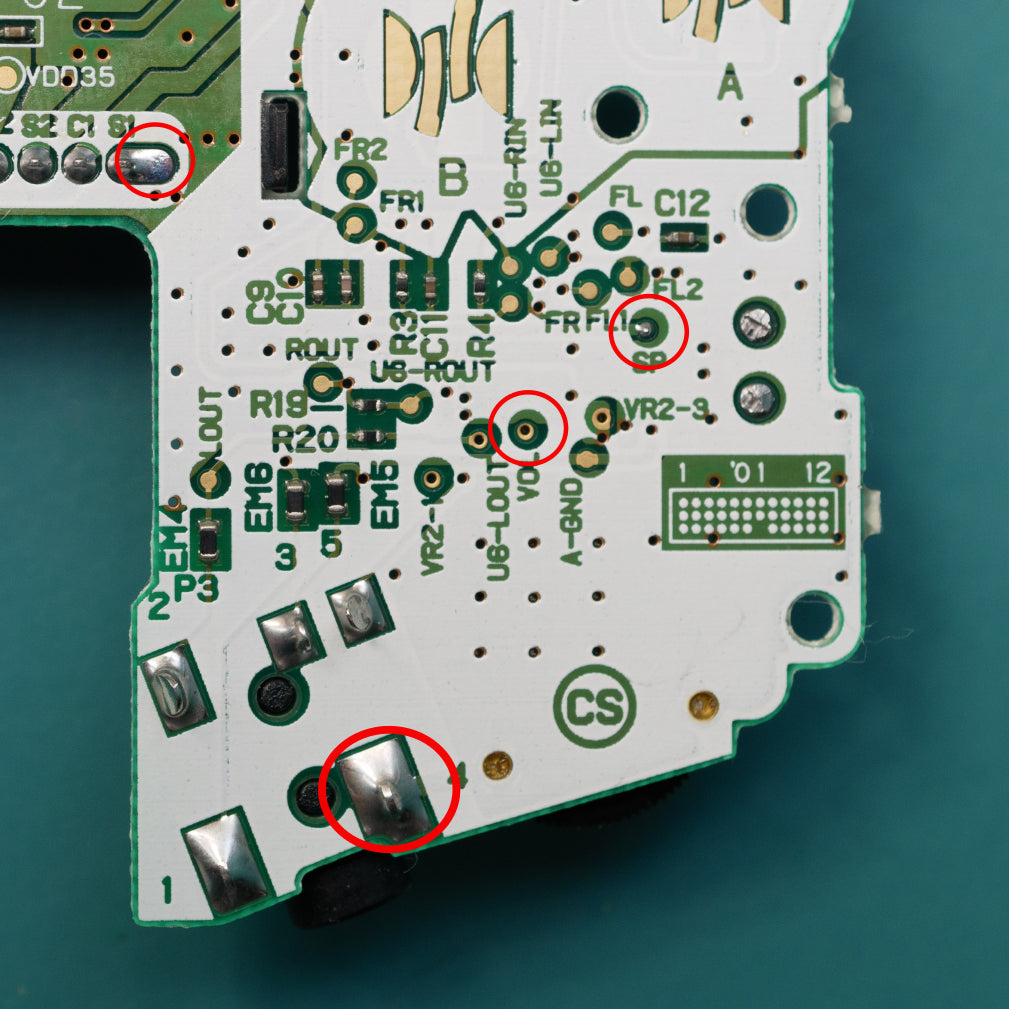
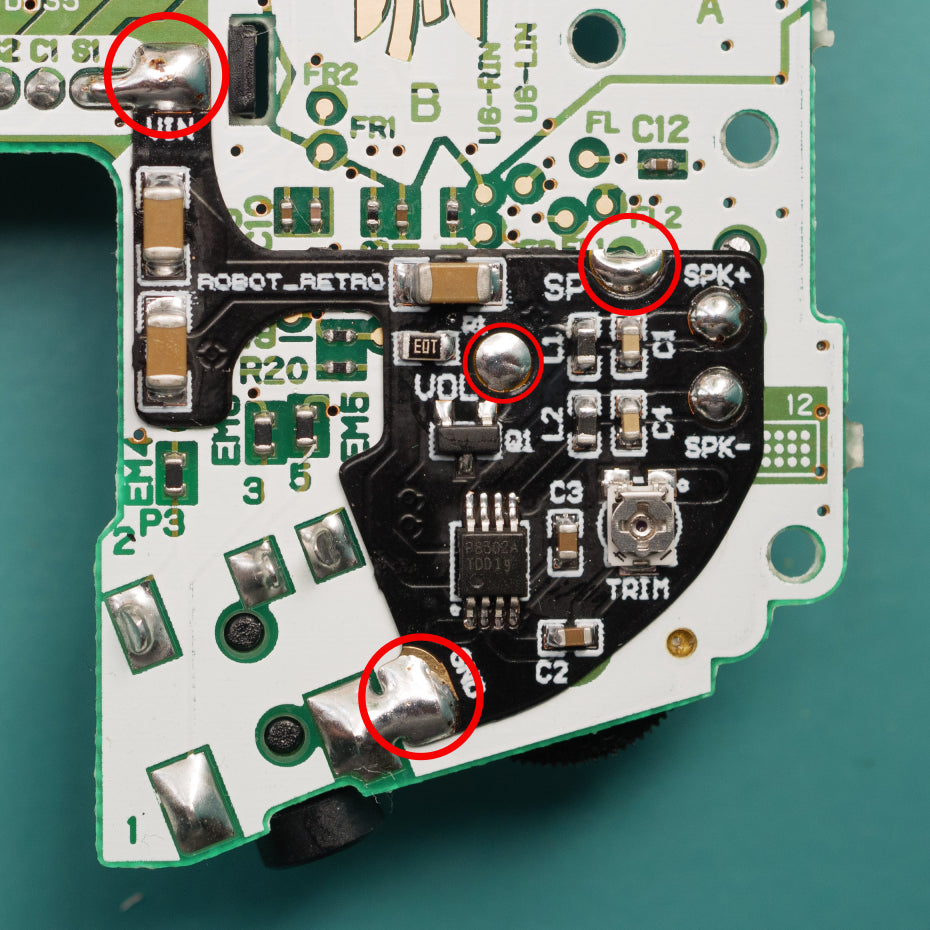
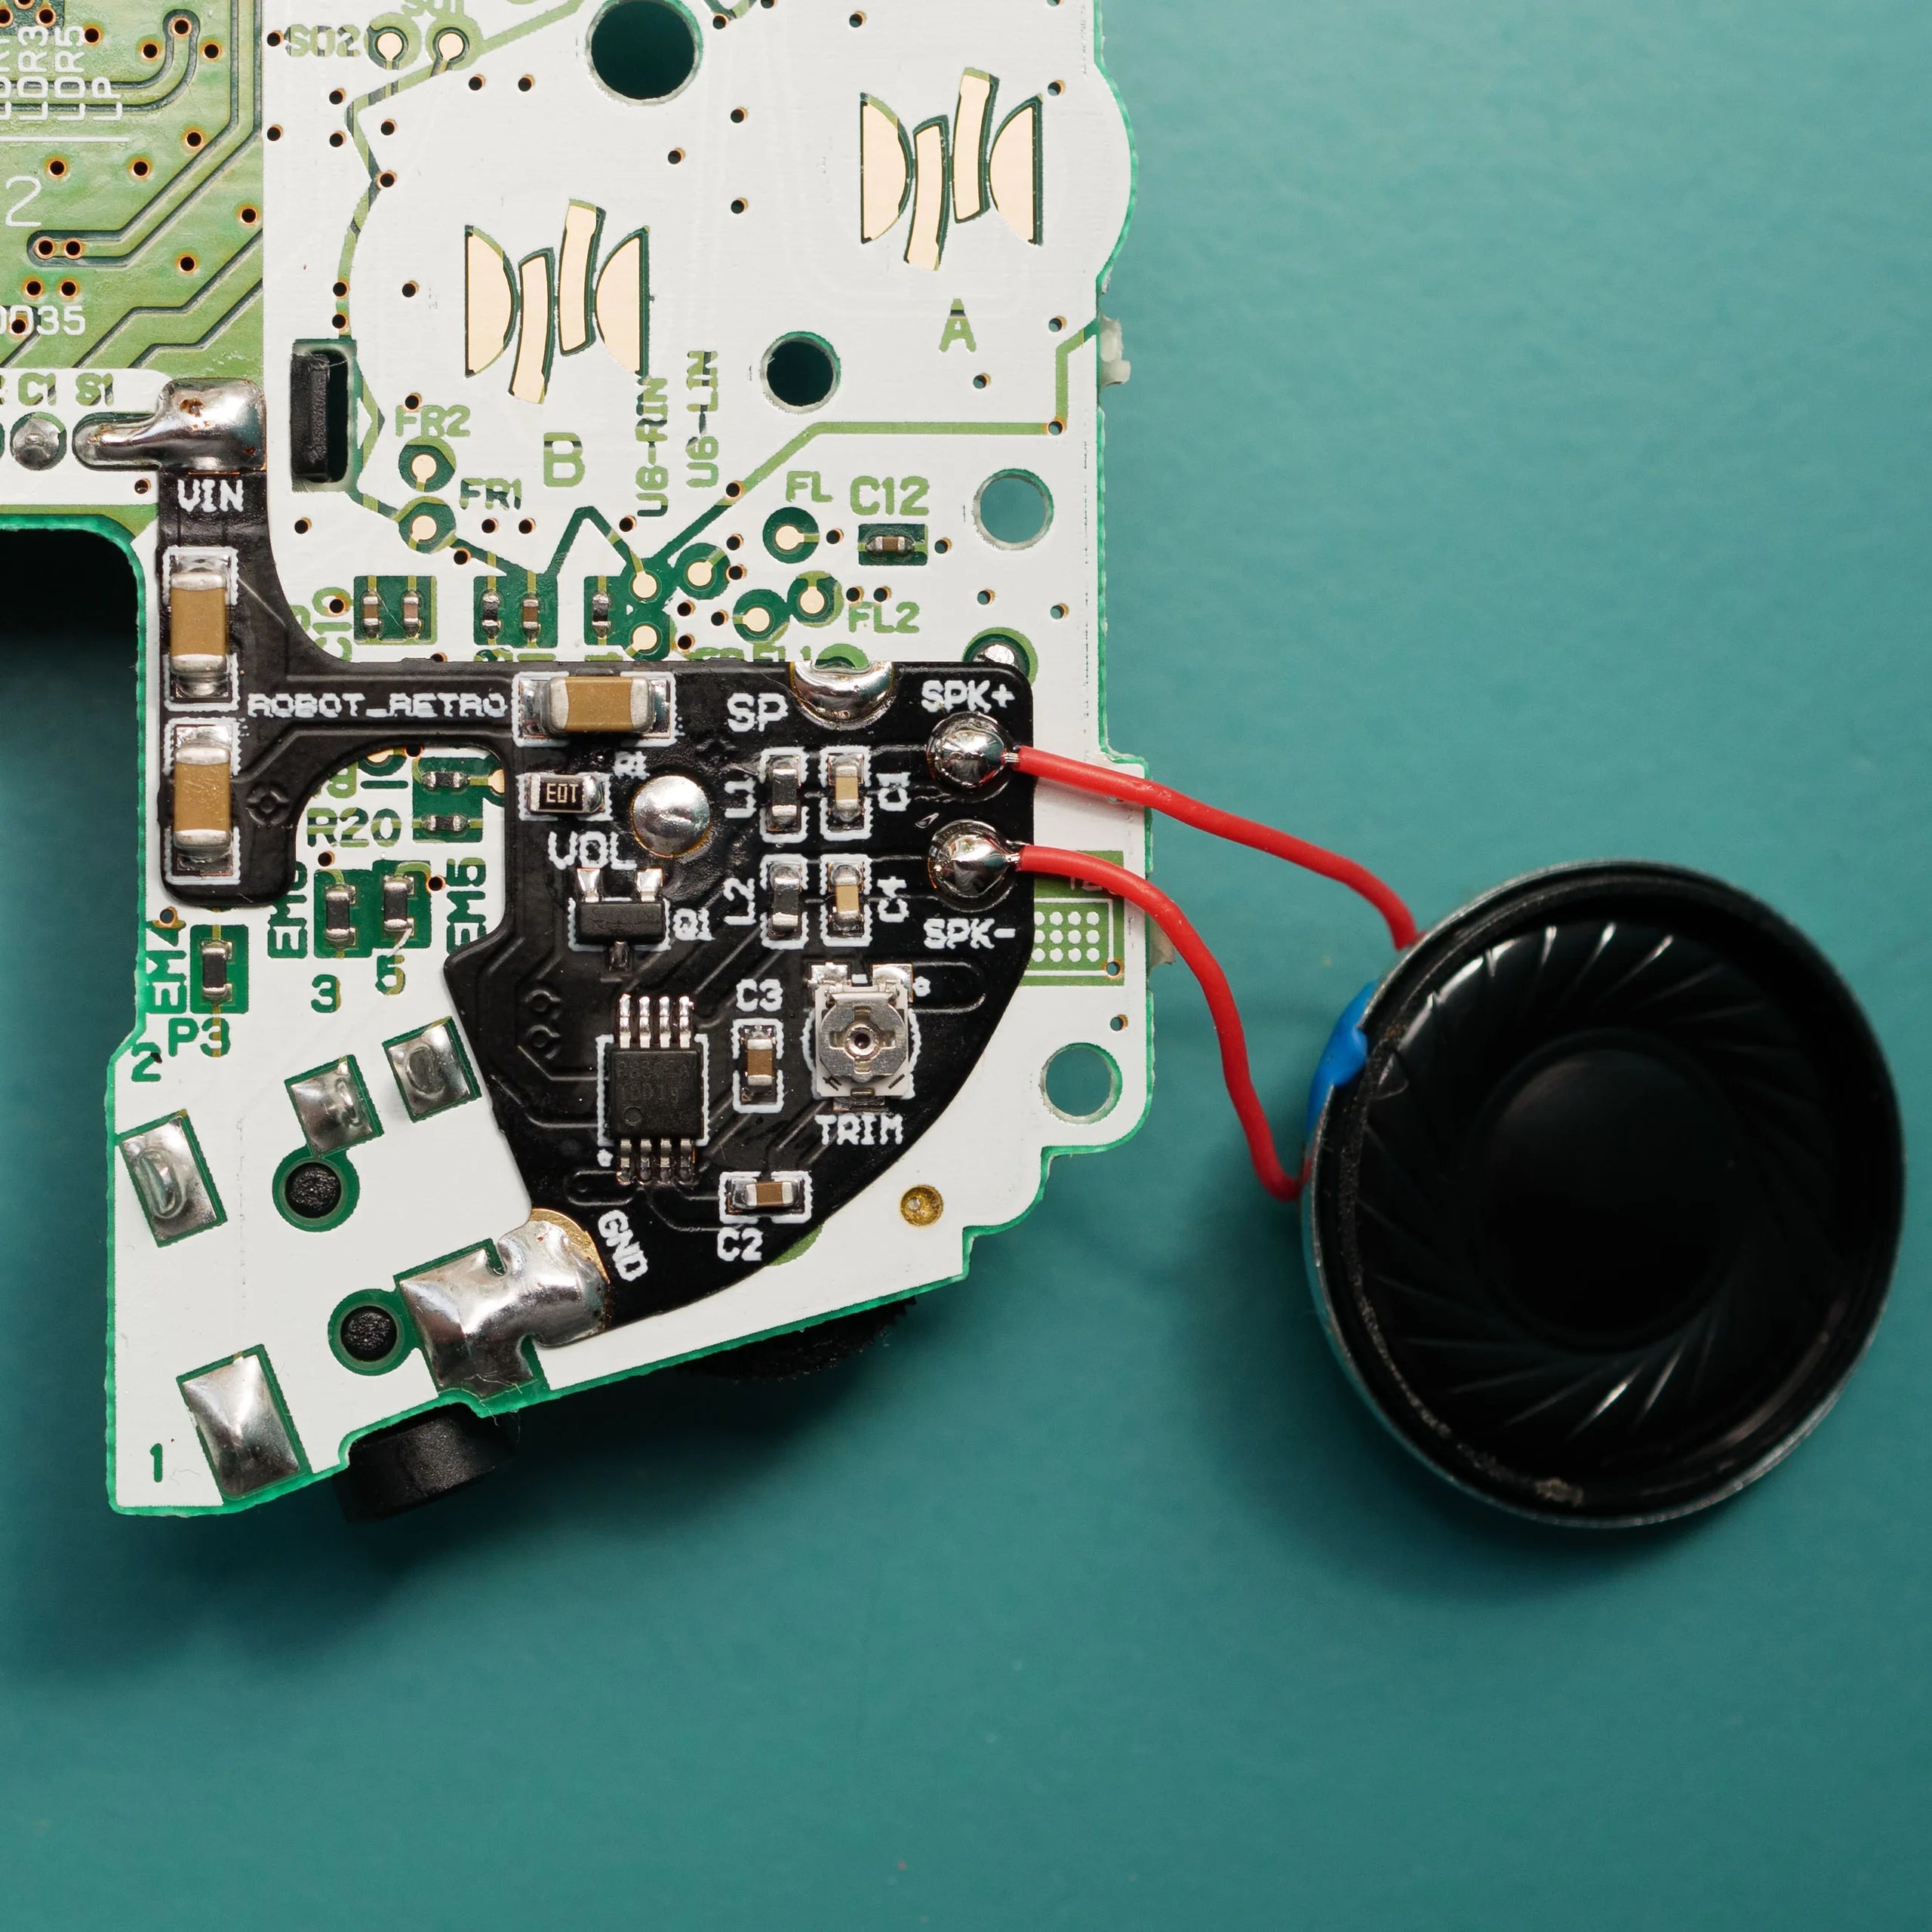


robot_retro
Flex Amp for Game Boy Advance with 2W speaker
Product SKU: MKWSEQRV
Available:
Only 0 item in stock
0 item in stock
In stock
Pre-order
Out of stock
$18.95